Help Topics
- Start Menu 10
- How it works
- Display mode
- Virtual Groups
- Foldable Groups
- Group Manager
- How it works
- Additional features
- Managing groups
- Tidy Start Menu
- PRO version
Group Manager - How it works
The Start Menu 10 installation package consists of the following two programs: Start Menu 10 – the program that replaces the system menu and Group Manager, a tool that helps organize programs into virtual groups.
To run Group Manager, right-click anywhere in the menu and select Group Manager or find the Start Menu 10 folder in the menu and start it as a regular program.

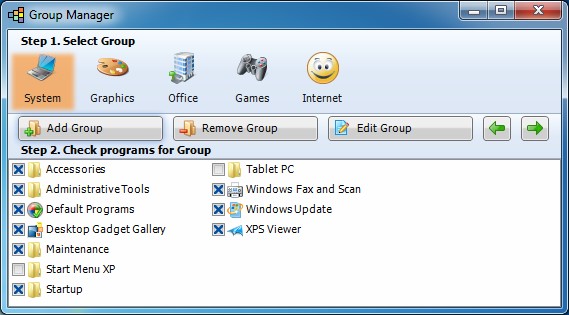
The program window consists of three parts:
1. Group area.
It is a bar with buttons that is located at the top of the window and where you see the current category.
2. Group management panel (for adding, deleting, changing or moving groups).
Note:This function is available only in the PRO version!
3. A list of programs.
You can see the list of programs currently present in your Start
menu. When you check the checkbox next to the name of a program in the
list, you move the checked program to the current group (You see the current category in the group area all the time).
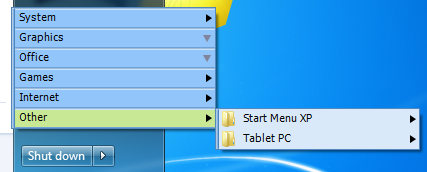
If a program does not checked in Group Manager, it means that it doesn't belong to any group and will be placed in the "Other" group in Start Menu 10.

Thus, to add a program to a group, you should choose group (step 1) and select the checkbox next to the name of the application (step 2).
To remove an application from the group, just clear the checkbox next to its name.
To move a program from one group to another, you need to do the following:
1. Select the old group.
2. Uncheck the checkbox.
3. Select the new group and check the program checkbox again.